
IPsec VPN between FortiGate and DrayTek
This article shows how to establish an iPsec VPN tunnel between FortiGate Router and Vigor Router. The example is using a FortiGate router on FortiOS 5.4.0.
The Configuration of FortiGate
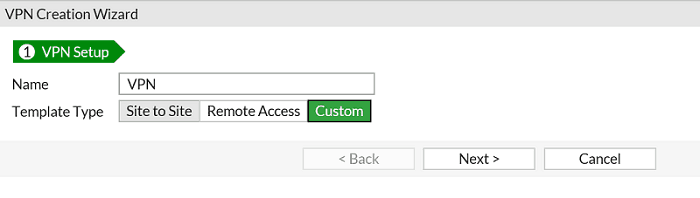
1. Go to VPN >> IPsec Wizard, give a name, select Custom for Template Type, then click Next >
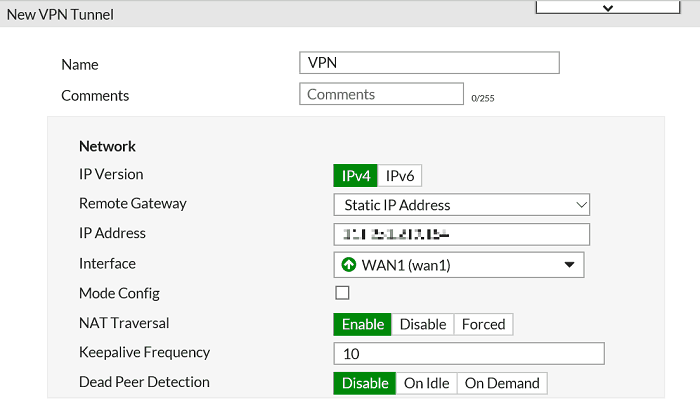
2. In Network settings, type the WAN IP of Vigor Router in IP address, and select the WAN interface where Vigor Router is on for Interface.
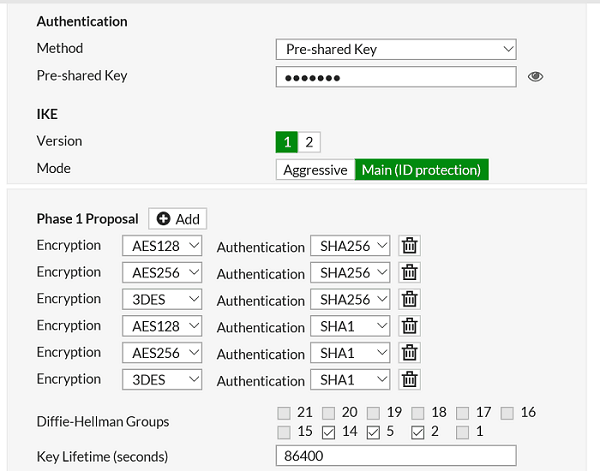
3. In Authentication settings, type Pre-shared Key and set a Key Lifetime (which Vigor Router uses "28800" by default).
4. In Phase 2 settings, type the IP subnet on FortiGate which you want to be linked to the Vigor Router for Local Address, and the LAN IP subnet of Vigor Router for Remote Address.
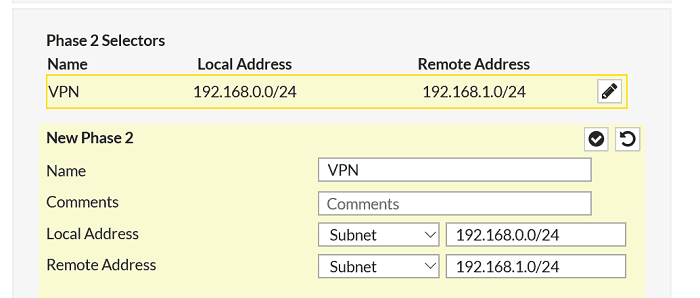
5. In Phase 2 Proposal setting, DISABLE Perfect Forward Secrecy (PFS), and set a Key Lifetime (which Vigor Router use "3600" by default).
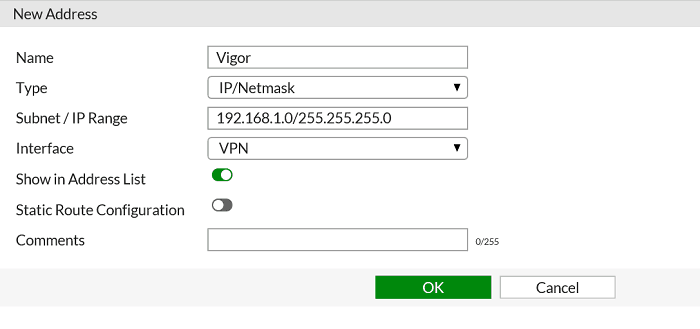
6. Create an address profile for policy setting: Go to Policy & Objects >> Addresses >> Create New >> Address, give a name and type the LAN IP subnet of Vigor Router for Subnet /IP Range, select the IPsec Tunnel we just created for Interface, and click OK to apply.
7. Create Firewall rules for VPN traffic: Go to Policy & Objects >> IPv4 Policy >> Create New, we need to accept two types of traffic: from Internal network to the Vigor network, and from the Vigor Network to the Internal network. (Note: Keep the rule order in mind, because you may need to manually adjust their priority. Usually, IPsec traffic will have the highest priority than most of the rules except for the management rule.

8. Create a Static Route for VPN: Go to Network >> Static Routes >> Create New, type the LAN IP of Vigor Router in Destination and select the IPsec Tunnel for Device.

The Configuration of Vigor Router
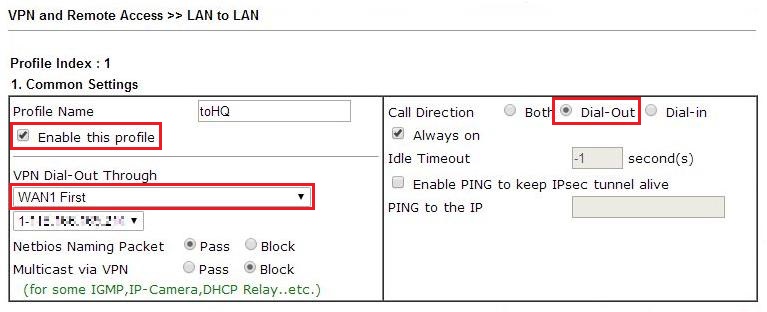
1. Go to VPN and Remote Access >> LAN to LAN, and click an available index. In Common settings, give a profile name, check Enable this profile, and select "Dial-Out" for Call Direction.
2. In Dial-out settings,
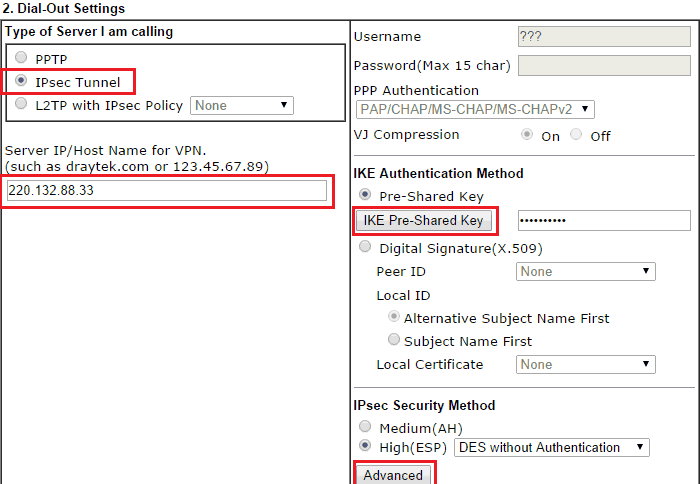
- select "IPsec Tunnel" for Type of Server I am Calling,
- type the WAN IP of the FortiGate router in Server IP,
- type the Pre-shared Key to match the settings on the FortiGate router,
- in IPsec Security Method, select High(ESP) AES with Authentication and click Advanced
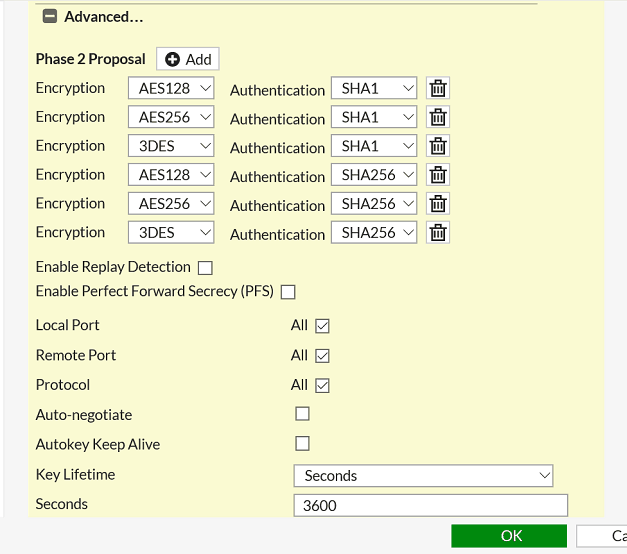
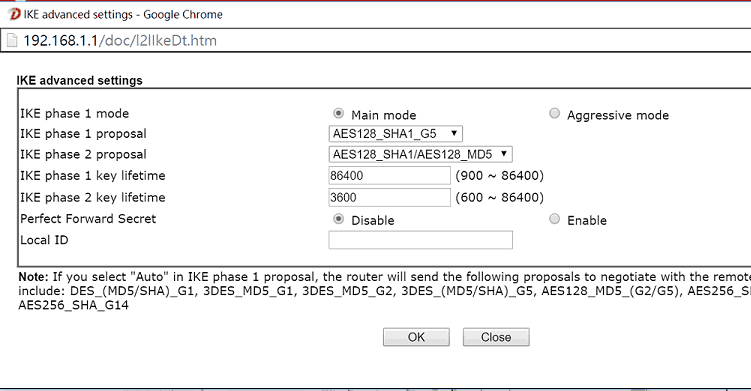
3. In the pop-up window, configure Key Lifetime and Proposals to match the settings on the FortiGate router.
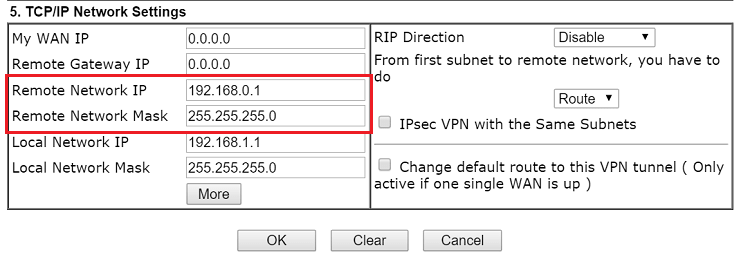
4. In TCP/IP Network Settings, type the LAN IP of the FortiGate router in Remote Network IP and Click OK to save.
5. As long as the profile is enabled, Vigor Router will try to initiate the VPN. However, you can go to VPN and Remote Access >> Connection Management to dial the VPN manually. Select the profile, then click Dial.

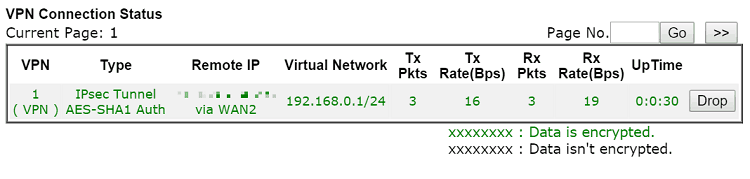
6. After VPN established successfully, we can see the status below.
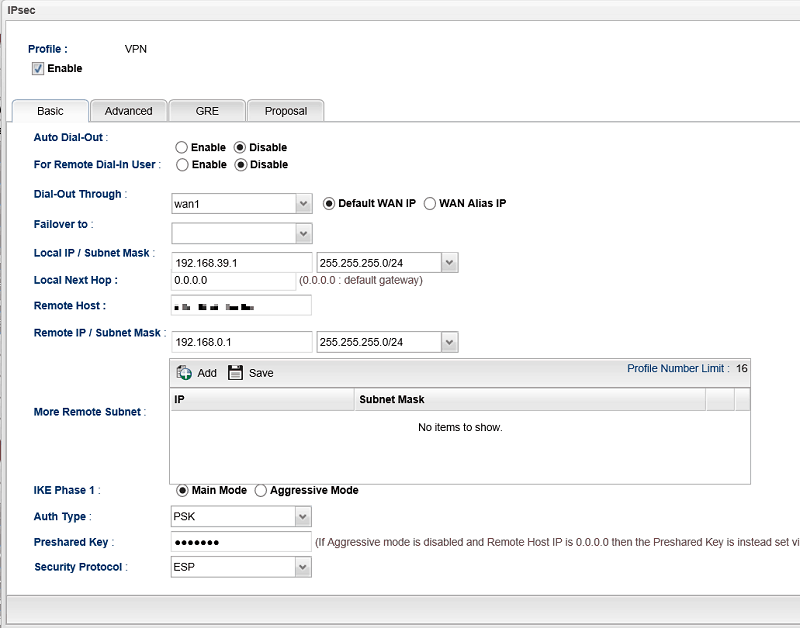
1. Go to VPN and Remote Access >> VPN Profiles >> IPsec, click Add to create a VPN profile, give a name of profile and enable it.
2. In the Basic tab,
- type the IP range of the local subnet you want to link to the FortiGate router in Local IP/Subnet Mask
- type the LAN IP of the FortiGate router in Remote IP/Subnet Mask
- type WAN IP of FortiGate in Remote Host
- use "PSK" for Auth Type, and enter the Pre-shared Key to match the settings on the FortiGate Router
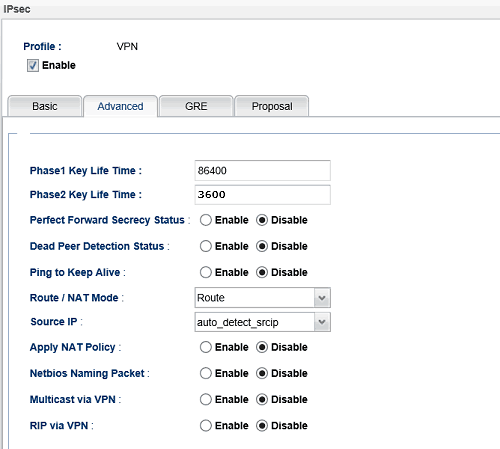
3. Go to Advanced tab, set Phase1 and 2 Key Life Time to match the settings on the FortiGate Router.
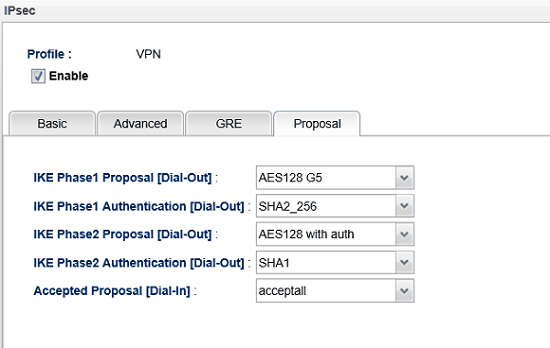
4. Go to the Proposal tab, select the IKE Proposals that matche the settings on the FortiGate Router. Then, click Apply to save.
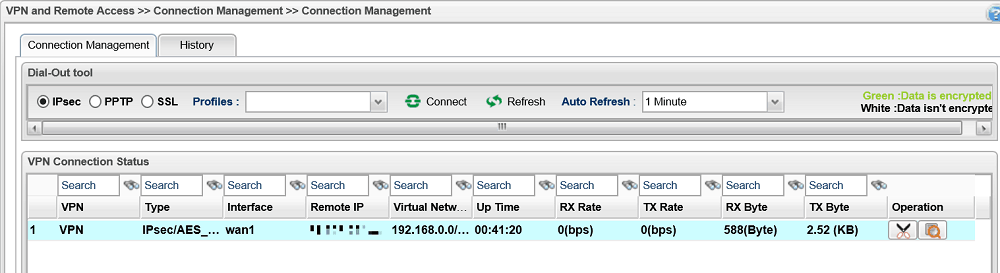
5. To initiate the VPN, go to VPN and Remote Access >> Connection Management, select the VPN profile and click Connect

6. After VPN successfully connected, we can see the VPN Connection Status below.
Published On: Feb 26, 2016
Was this helpful?